The Weaver Project…
Back in May, I wrote a blog detailing my efforts to take a decent photograph of a kingfisher, imaginatively entitled The Kingfisher Project.
Ever eager to take on new challenges, as long as they are not too difficult, I have just finished another photographic exercise in which I paid a series of visits to Kranji Marshes to take images of golden-backed weavers. I have called this “The Weaver Project”. These names just jump out at me; it’s a gift.
Here in Singapore, I follow a few local nature pages on Facebook, some official and some run by enthusiasts. I monitor these pages to get ideas and locations for wildlife photography. If this is something that interests you, I would highly recommend looking out for similar groups in your area. It was through engagement with one of these pages that I became aware that the golden-backed weavers had started nest-building in various parts of Singapore. So, the wheels were in motion and I set about trying to get snaps of these industrious little birds. The images in this blog were taken over several visits to the marshes, where I tried to snap different nest in different areas, tweaked my equipment and tried to get better and different shots on each visit. On the equipment side, I feel that bird photography is one area where equipment makes a massive difference. For each shot, I shall give info on the equipment used as well as the camera settings.
I feel I need to make an important point on settings as I am often reluctant to share them. The settings I used were based on the lighting conditions I faced at the time and the type of image I was attempting to capture. The lighting conditions are important - the light at 7 am in Singapore on a cloudy day with shade from trees will be different from the ambient light if you shoot in the midday sun on a clear day in a different location. Therefore settings are not immediately transferable, and adjustments would need to be made. That said, they may give a base idea, so share I shall.
As I have stated in previous blogs, I in no way consider myself an authority on photography - I am merely sharing my own experiences, and you can make of them what you will. There are far better and far more knowledgeable photographers out there. Hopefully, however, you will enjoy some of these images and maybe get an idea or two for yourself.
I shall also post a couple of awful images; hopefully, they shall give some context and insight into my thought process. I have few qualms about embarrassing myself, been doing it most of my life.
Anyway, on with the show…the main shots hopefully show progress and improvement, then I shall some general ones that may be of interest, throwing in some photography facts and Weaver info along the way.

OK, there’s no two ways about this, it’s bloody awful. However, it was a “test shot” from which I based camera settings for follow up shots.
I had made my way to one of the bird hides in the marshes, from where I knew I would have sight of the reed beds and the weavers. It was further away than expected, and I realised that there must be better locations around, based on images I had seen on Facebook. However, I thought I’d give it a go. And if nothing else, this image provides a base against which to compare later photos.
I set up the tripod and took this shot with a Canon 5d Mk4 and a 400mm 2.8L lens with a 1.4x extender, giving a focal length of 560mm. The set up weighed a lot. A LOT*. The settings here were 1/500 at f7.1 and an ISO of 1250. This image is straight from camera, zero editing aside from a RAW/jpeg conversion. I shot on aperture priority, and centre weighted exposure. This shot helped me understand the problematic lighting conditions - I was shooting towards the sun; the scene was backlit. Not ideal, but you can only play with the cards you are dealt.
* Footnote - the camera gear weighs just over 10kg

This is the previous image after some basic editing. If it weren’t for this blog, this shot would go straight in the bin. But it did help me at the time - I now knew the problems I had with the light and the distance, I was certainly not going to get any close-ups of the weavers. However, after a couple more test shots, my mindset changed a little, and I thought about trying something a little more “arty” and using the conditions to my advantage. The result of that process is as follows…

OK, now I know this isn’t a classic weaver shot or the image I was aiming for when I went out that morning. But when I came up with this, after a little editing, I was reasonably pleased - it looks kinda pretty, almost has a Japanese feel to it. Same Canon camera, the settings were 1/6400, f5.6, ISO 1250.

A brief pause in proceedings here, just to give some additional background into what goes into getting some of these shots. The life of a would-be photographer isn’t all first-class travel, champagne and living it up on the red carpet with fellow “A” listers. That’s a part of it, obviously, but sometimes you need to put in some effort. To get these images, I was up before sunrise and driving to the furthest reaches of Singapore after a relatively late evening of deciding on cameras and lenses and generally cleaning and prepping my equipment. When I reached the marshes, I had a reasonable trek to the hides, carrying a massive camera/lens combo, a heavy tripod and a bag with a spare camera, water and other bits and bobs.
Then there were warning signs for wild crocs, and I had to clear away some spider webs from the hide. That was nasty. Plus there were various flying things, and Singapore is currently on target to achieve the highest dengue levels ever recorded on the island. Finally, to cap it off, on the way back a family of wild boar crossed my path - admittedly, they were a decent distance away, but those things attack people, and there were warning signs around.
So, no, it’s not all glitz and glamour.

To wrap up my first effort at snapping the weavers, I visited another nesting area near where I had parked. Had I gone here initially, I would have taken better images, avoided crocodiles, spiders and wild boar and would not have had to lug my gear across a steaming marsh. That annoyed me a little, I must admit.
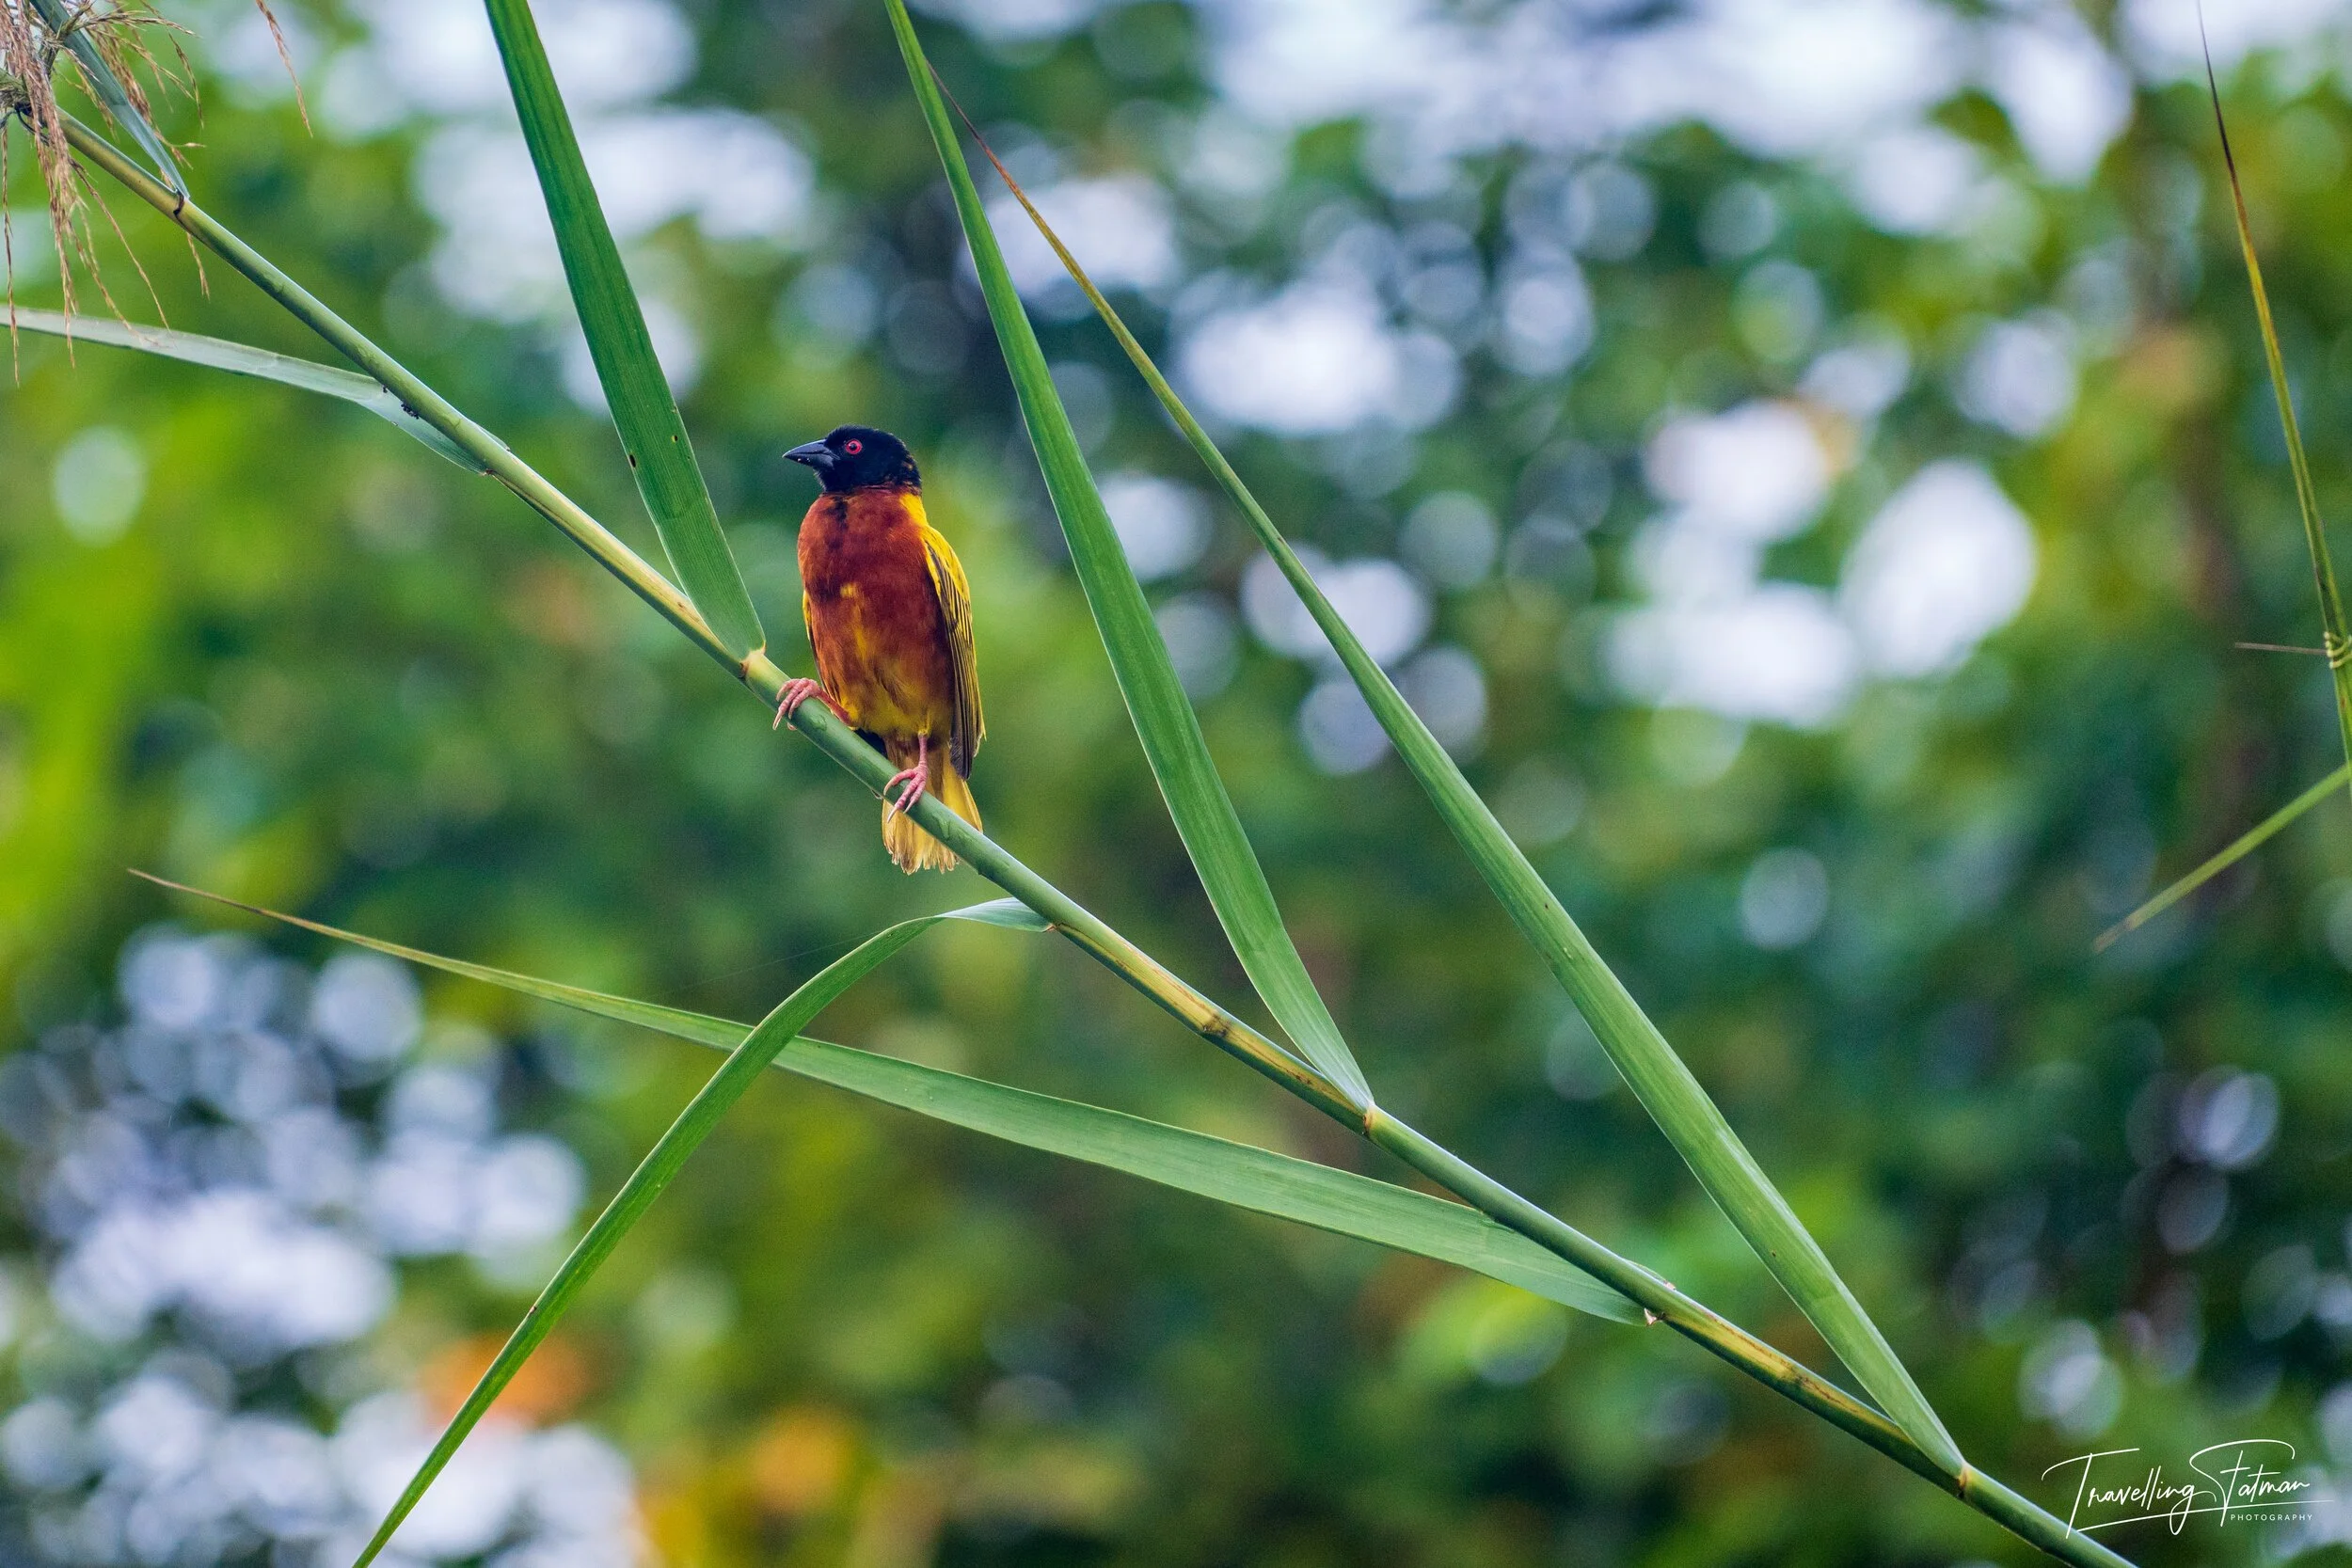
But then I saw this female weaver obligingly sitting on top of this reed and waiting for me to take some shots. Same Canon camera/lens set up, shot at 1/8000, f4, ISO 1000. Why the fast shutter speed? Well, I was shooting on burst mode and was hoping to catch the weaver in-flight. Sadly didn’t happen, but you can’t have everything. Now, I kinda like the way the weaver was caught here, but the background is not ideal - featureless skies that gave me food for thought.
A few days later, I returned to Kranji, but skipped the hike and based myself at the nesting area near my parking spot. The settings for this shot were 1/250 at f4 with an ISO of 1250. This was still early morning, not long after sunrise, so daylight had not fully broken. I set the ISO manually and shot on aperture priority - meaning the camera light meter set the shutter speed. I could have upped the ISO to allow for a faster shutter, but for a stationary subject when I was using a tripod and a cable release, that wasn’t necessary. For anyone not familiar with the “exposure triangle”, this is a mechanism for understanding the relationship between the three elements affecting exposure; aperture, shutter speed and ISO. Each component can be adjusted to change the amount of light reaching your camera sensor, but there are other consequences as well. Learning the exposure triangle helps you make appropriate decisions based on lighting conditions, subject matter and what you are trying to achieve in your shot.
For anyone really interested in learning about exposure, I would recommend Understanding Exposure, Fourth Edition: How to Shoot Great Photographs with Any Camera
This book uses the terminology “photographic triangle”, but it’s the same thing. For this image, I think there is an improvement in the background compared to the previous shot - but the bird wasn’t big enough in the frame and maybe some sharpness issues. However, I do like the composition with the various diagonals. So…better…but can do more.

1/1250, f4, ISO 1250 - 560mm on the Canon. I had started to think more about the background, and I think this is more appealing with nice soft greens and no blown out sky. The challenge was finding a route through all the foliage and getting a clean shot of the bird. For my standard, this is a decent shot. There’s a behavioural aspect, sharpness is ok, bird stands out nicely against the background and sharpness on the weaver is acceptable.

For my third visit, I used a different camera and lens. This was shot on a Sony A7iiir with an FE 200-600mm F5.6-6.3 G OSS lens. The 600mm lens gave a little extra zoom, and the increased megapixels would help with any cropping when it came time to edit. Hopefully, some of the benefits can be seen in this shot; the bird dominates more of the frame. We have some behaviour action, we can see some of the little one poking out the nest to get fed, and there is good detail on the nest itself. There is also some decent bokeh, which I wasn’t expecting - so that was a pleasant surprise.
However, and this annoyed me no end, there is also an issue with sensor spots. You can see these most noticeably in the light area just above and to the left of the nest. These can easily be removed in pp work, but I have left them here to illustrate the issue. With the Sony being mirrorless, sensor spots are a more significant issue than with the Canon. So, an ok image, but still some learning points for me.

1/3200, f5.6, ISO1250. I was lucky enough to have a bright blue sky on this visit. Shot on aperture priority after setting the ISO. There were some sensor spot issues, but I removed them in pp. I think I should also have removed the stray leaf in the top left. I’m pretty happy otherwise with this shot - and impressed with the Sony overall.

One more from the third visit, again on the Sony. 1/8000, f6.3, ISO 1250 and a focal length of 600mm. Shot on aperture priority, with the camera meter determining a shutter speed of 1/8000. With that speed, I could have lowered ISO and/or increased depth of field - and I did, for subsequent shots. That said, the settings produced the shot I wanted. Sharp, exposure is fine, good details, and I like the composition on the whole.
One point to add is that these were all shot on autofocus, including the Canon. Now, in some cases, the camera may pick the wrong focus point - especially in an environment like this with a small target and reeds getting blown about in the wind. But the alternative is manual focus, and I question my ability to quickly compose, focus and shoot before the bird flew away. The auto technology is there; it’s fast, it usually nails it - use it. OK, on to the fourth and final visit.

For this visit, my fourth, I took along the same Sony and lens but added a 1.4 extender. At full range, this would now give a focal length of 840mm, but the flip side is that adding an extender reduces the available apertures, requiring adjustments in ISO and/or shutter speed to compensate. It is also worth noting the rule of thumb that your shutter speed should be at least 1/focal length to maintain sharpness, i.e. at 600mm, you need a shutter speed of at least 1/600 etc. This is to minimise camera shake affecting your image, but clearly, other factors such as image stabilisation, tripods and cable releases can help on that front.
This image was shot at 670mm with a shutter speed of 1/640 at f9 with an ISO of 3200. It was taken around 7.30 am, not long after sunrise. So the light was not optimal. All in, I’m pleased with the result. Even at f9, the Sony produced a soft background. I think that the background aspect is important - this vibrant green is far more attractive than a blown-out sky.

1/640, f9, ISO 2000 and focal length of 840mm. By now, I was getting happier with my results and had hopefully learned a few things - scout the location, watch out for your background, think about the appropriate equipment and watch out for dust spots on the sensor! Patience was also key here - the birds would often fly away for one reason or another. Chasing them was largely an exercise in futility - the key was to choose a nest, set up and wait. That resulted in this shot, one of a male weaver building his nest. Hopefully, you will agree this is a world away from the first images posted in this blog.
One more element required is “luck”. Getting a blue sky, not having reeds blowing into the shot, having a bird turn at the right time - so many elements come into play. Of course, you can improve your chances with practice, using the right equipment and having patience; there are ways to move the odds in your favour.
One more aspect that helps is shooting in burst mode rather than trying to time a single shot. The Sony can capture ten frames per second, a feature that can really help when shooting fast-moving wee birds.
Anyway, these images represent my personal progress over the course of 4 visits to a weaver nesting site here in Singapore. I shall now just share a few more snaps and throw in some weaver facts without the nerdy stuff!

The golden-backed weavers are also known as Jackson's weaver and are native to Africa. They were first seen in Singapore in 2011 and seem to be flourishing. The male builds the nest under the supervision of the female. At once stage, as I was watching a male doing his thing, a female appeared and stared squawking loudly at him - he flew off and returned shortly afterwards with fresh building material. It looked very much as though he was being given an earful for doing some shoddy work. We’ve all been there, mate…

A mother feeding her chick.

I know not the sharpest of images, but it shows a male weaver flying to his nest while carrying a fresh leaf with which to continue building his nest.

As we are at the tail-end of this blog it seemed fitting for the final image to be the tail-end of a golden-backed weaver. See what I did there? I have to say, that’s an ending right up there with “And they all lived happily ever after”.
Well, that really finishes my Weaver blog and I hope you at least enjoyed some of the images, if not the waffle. Man, that went on a bit at times. But for me, I really enjoyed the whole process. I reminded myself of some learning points, picked up new ones and finally got with some shots that I am happy with. Happy days. My main takeaways from this are, in no particular order:
Understand your location
Use the appropriate equipment for the photos you are taking
Understand the capabilities of your equipment and learn the exposure triangle
Clean your sensor - those spots are a pain
Remember guidelines such as 1/focal length (n.b. guidelines, not rules)
Use burst mode when appropriate
Editing is not a crime and is usually necessary
Produce images that you like - if anyone else likes them, it’s a bonus
Be patient
OK, that’s enough of that. Finally, some self-promotion. Embarrassing, but as mentioned at the start, I am pretty well used to embarrassing myself. You can find some of my snaps in various forms at the following places:
Jigsaws Various designs - I have ordered a couple of these myself, the quality is good
Redbubble Prints, mugs, stickers and goodness knows what else
Displate Prints on metal
Picfair Prints
Enough of that, I’m done now, blog over!
Wishing each and every one of you all the very best - stay strong, stay safe, be kind!
Fatman xxx